The painful birth of the Rio Olympic Park
August 02, 2016
Showing olympic infrastructure at the beginning of the Games is not very innovative and original, I know. But when I checked the Olympic Park in Google Earth I noticed it had a lot of historical imagery. This might or might not have something to do with the 'Olympic Security Package' of Digital Globe, the satellite image supplier of Google Earth and Maps. But I decided to use the imagery to tell the story of the site over the last ten years (Dutch, or here in French).
Since the Pro version of Google Earth became free, everyone can export high quality images out of Google Earth very easily. So I used the Export image feature for every historical image Google Earth has available, making sure not to change the viewport and zoom level. So I ended up with 33 images of exactly the same area, spread out over a 10 year period, but concentrated in the last 2 years.
Skimming through them, I saw the images showed the history of the site really well. It was a good opportunity to learn how to work with ImageMagick, a command line tool for image manipulation. I used Imagemagick to batch crop all the images from Google Earth by executing the following command in the Terminal (from within the folder where I saved all the images):
mogrify -path crop -crop 960x640+169+74 *.jpg
Pay attention: without -path, you'll overwrite all your original images. '-path crop' means 'save the results to the subfolder/crop'. The numbers are the crop dimensions and the location of the pixel where to crop from.
You can also create an animated gif for all images in a folder. Move to the folder containing the images and execute the following command in the Terminal:
convert -delay 40 -loop 0 *.jpg olympicpark.gif
-delay 40 means every frame in the gif is shown for 40 centiseconds, -loop 0 means an infinite loop.
 I added the datestamps manually in GIMP, before generating the gif.
To see what a less shocky gif would look like, I used iPhoto (yes: iPhoto) to make a slideshow with faded transitions. I exported the slideshow video out of iPhoto and converted the video to a gif (I used GIF Brewery for that). I liked the result, so for the final animation a colleague used Adobe Premier to make a video with fades between the images:
The story
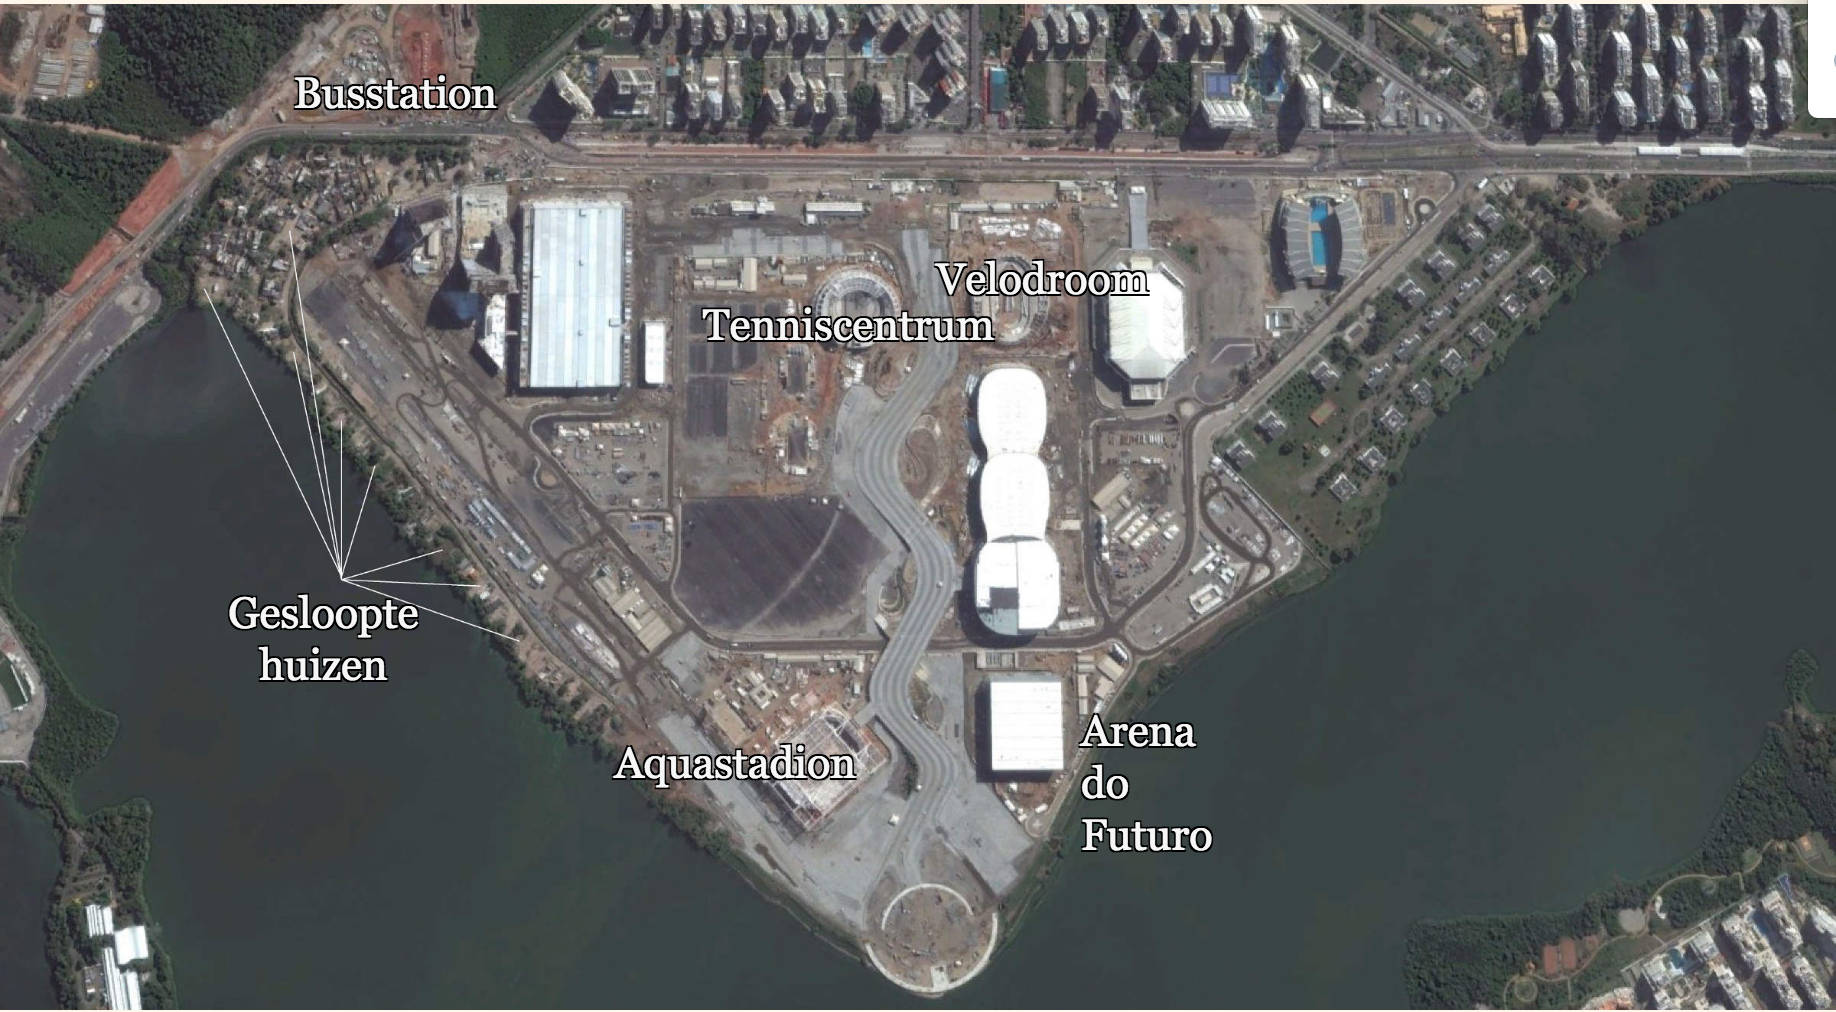
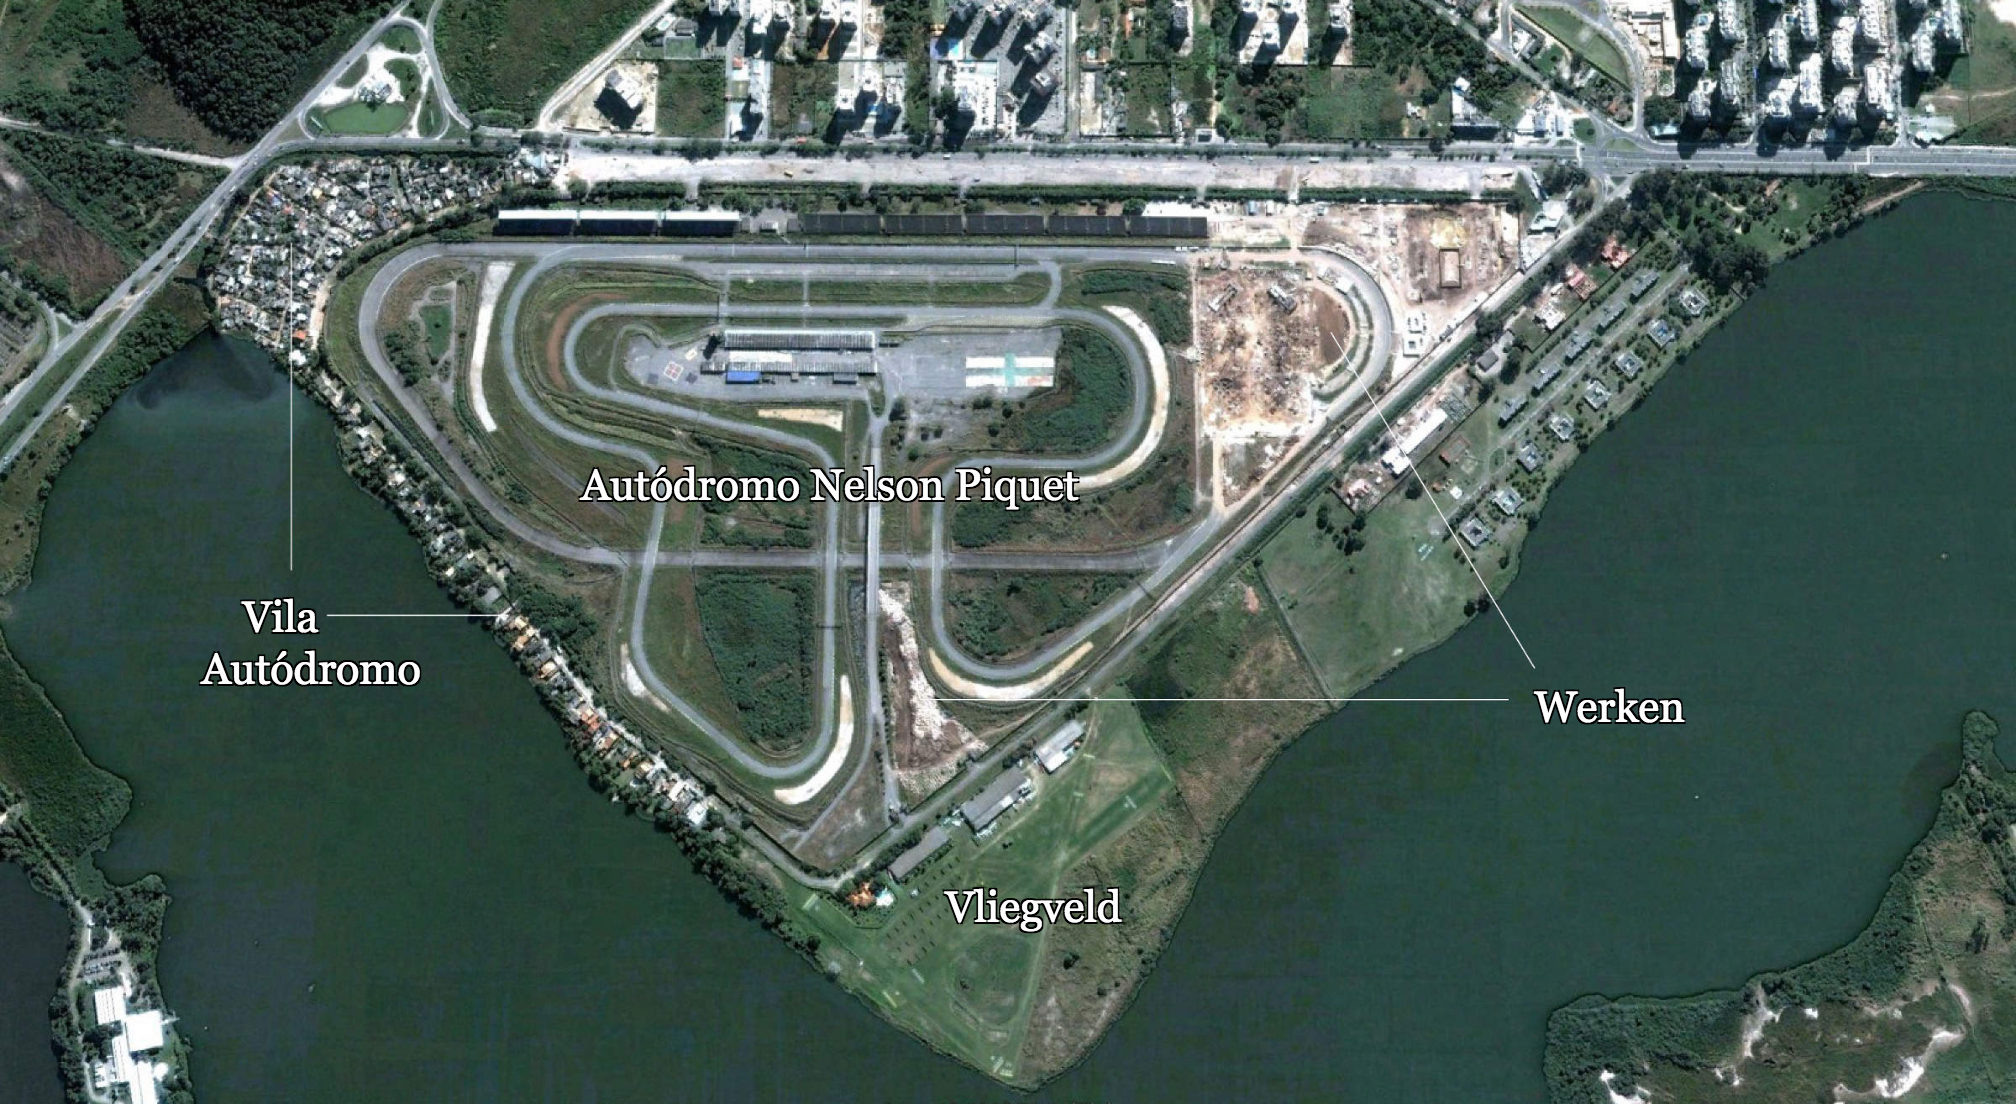
There are a lot of things going on in the animations and I wanted to highlight some of them. So I selected 9 images out of the 33 available (the oldest, the most recent and 7 interesting ones in between) and wrote some copy to link them together and highlight some of the things they show.
But explaining the reader where to look in the images in words is, of course, much harder than just annotating the images. This was an excellent opportunity to learn how to work with ai2html, an open source tool developed by the Graphics team of the New York Times. ai2html converts Illustrator documents to html and css. This has some big advantages. It also facilitates translation of content.
I'm not an Illustrator power user at all (I hardly use the program), but adding some lines and text to a base image isn't very complicated. After that, it's just running the ai2html-script to get the html.
Note: the image below is not the result from ai2html (this blog's cms can't digest the resulting html). Check the result in the article.
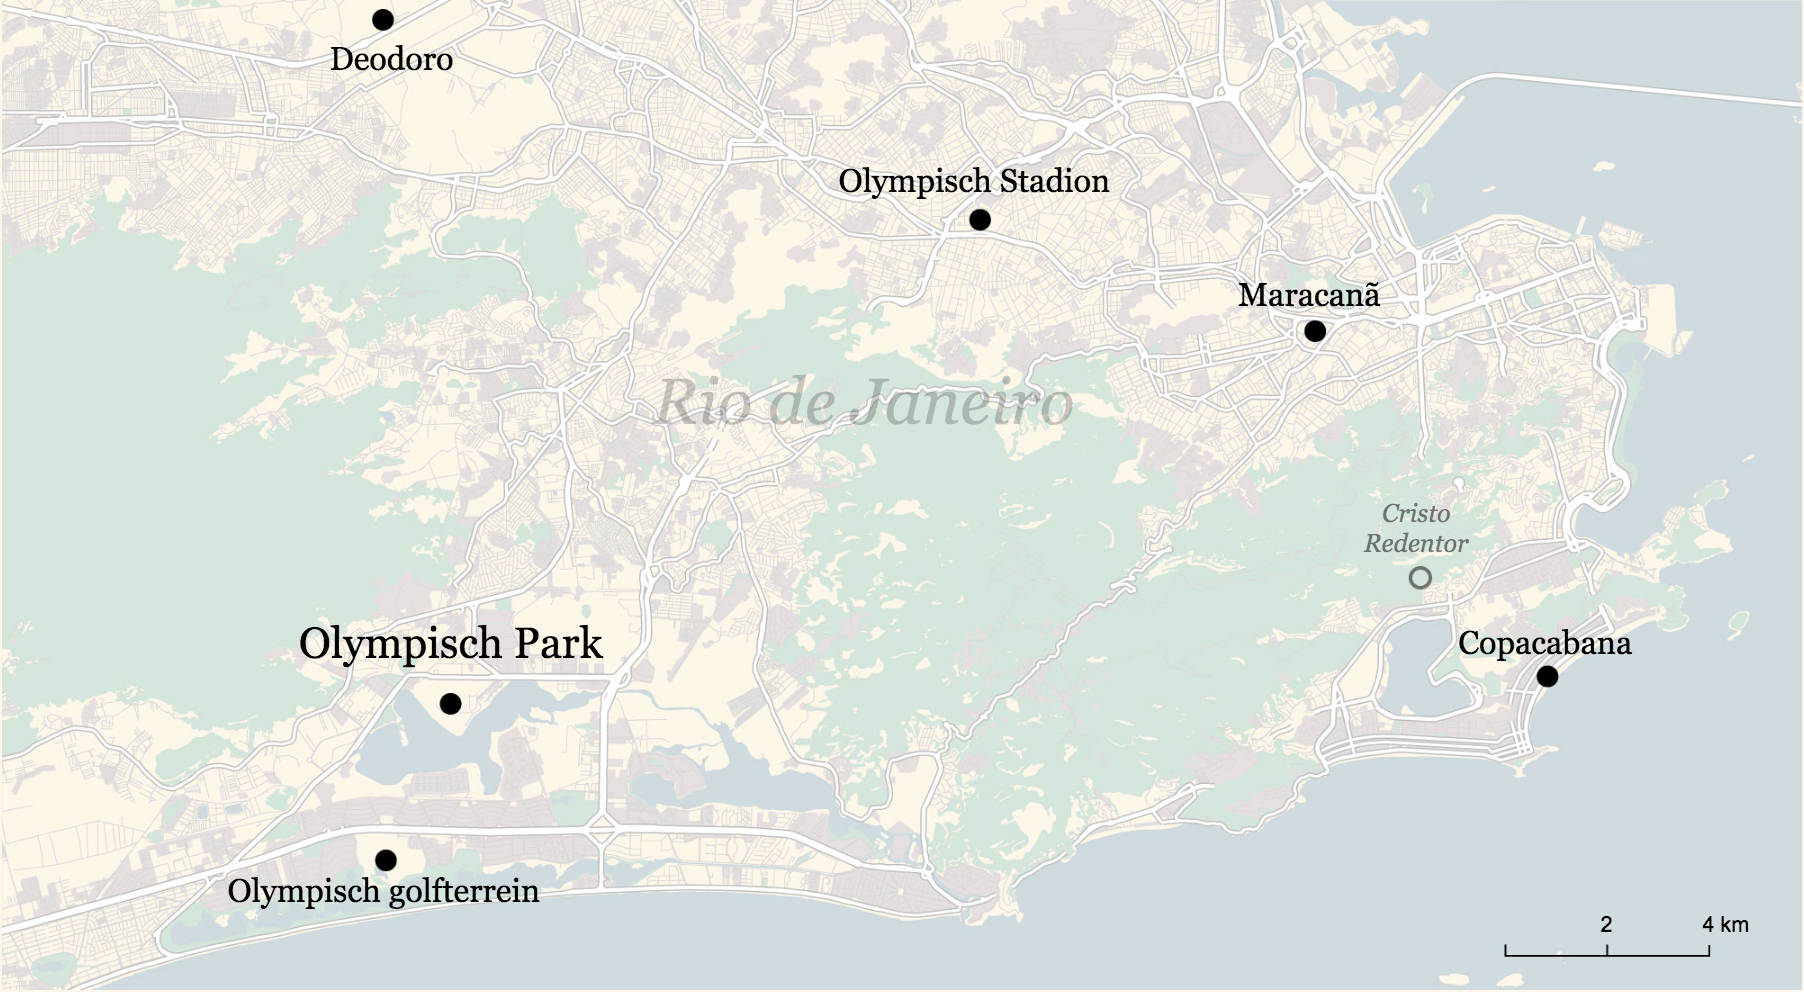
Overview map
An article like this obviously needs an overview map that shows the location of the site within the city of Rio de Janeiro. So I needed a base map on which I could pinpoint the site and the other venues of the Games. I experimented with some image based layers (from Mapbox), but the results where not very attractive.
So I looked for some OpenStreetMap-to-svg solution. I tried Mapzen's svg-export, but I liked LocalFocus's VectorMaps better. Then I used ai2html again to make the final map.
One more thing
This was my first project for which I used Gulp. I don't understand exactly how it all works, but I'm lucky to have a colleague who set up a little workflow to easily start a new project, test, build and publish it. So thanks @raphaelcockx for making my life work a little easier!